Your Shopping Cart is empty.
View Cart (0 Items)
How to Make a Bow and Arrow
How to Make a Bow and Arrow
So you want to become a bowyer and/or an arrowsmith? Why not? People have been making bows and arrows for thousands of years, with much less access to various quality materials and information, and in far less luxurious circumstances than many of us take for granted today. Bow and arrow making can be a very fulfilling and rewarding endeavor.
That is why, even with access to modern compound bows or firearms, there is still a growing enthusiasm for traditional archery, using traditional materials and techniques to this day. There are many types of bows, arrows, and methods of construction. That is why, in this article, we have gathered and organized a great deal of information on how to make a bow and arrow all in one place. We will start with some basic concepts and then delve into more nuanced bow and arrow construction areas. Some of the things we will cover include the following:
- types of bows and arrows and how to decide which ones you would want to build
- how to make a simple homemade bow and arrow using household ingredients
- how to make a bow and arrow in the wild
- how to make a longbow (or any self-bow)
- how to make a composite bow
- what is the best material to make a bow and arrow?
- and much more!
Without any further delay, let’s find out how to make a bow and arrow.
Is It Easy to Make a Bow and Arrow?
A question often asked (especially by the young, impatient, or overly ambitious) about bow and arrow making is: is it easy to make a bow and arrow? It depends. I know, not the definitive answer you were probably looking for, but it’s true. As you will soon see, there are many types of bows, materials, and methods of construction. Some types of bows are relatively easy to make. It is a simple matter of gathering the materials and following a few simple instructions.
For example, one could make a simple self-bow from a single branch of wood and a string in less than an hour with minimal labor and by following a very simple set of instructions. Constructing such a bow would be considered by most to be relatively easy.
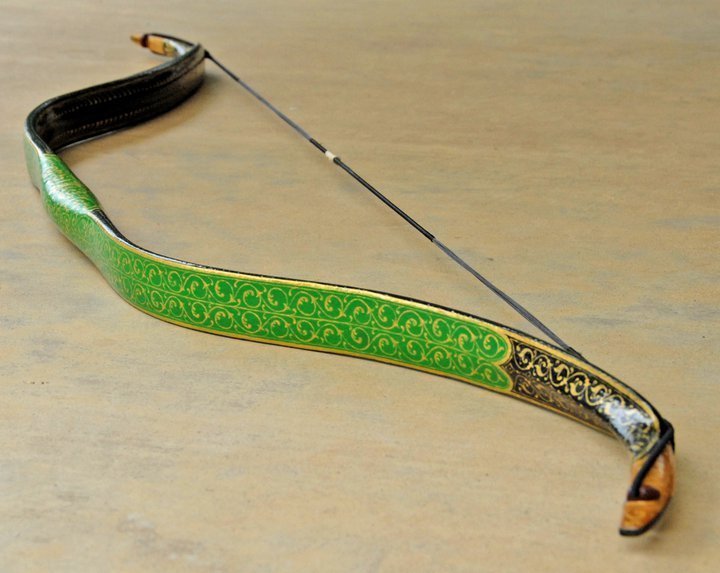
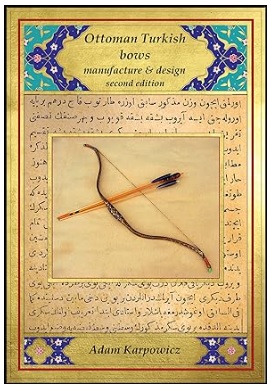
A composite bow of say the Ottoman Turkish variety, on the other hand, would be much more laborious and consume much more time. Some of these bows take years to bring to full completion. An intimate knowledge and experience of various materials including wood, horn, sinews, organic glues as well as paints, lacquers, and leather would be required to make a well-functioning and historically accurate bow.
That is why, in this article, we hope to enlighten you on a variety of bows and arrows as well as their construction methods as well and other resources to help you make your own bow, however minimalist or intricate you wish.
How Long Does It Take to Make a Bow and Arrow?
Another common question sometimes asked by the aspiring bow and arrow maker is: how long does the construction process take? Once again this will depend on the type of bow and arrow you wish to build. Some skilled and experienced bowyers can make a bow on the fly in 10 minutes. This will of course be a very simple bow. Some composite bows can take a year or more to complete. Here is a breakdown of some bows and their respective construction times.
- Traditional Medieval English Longbow – over 1 year to cure the wood, plus another year for full construction. 2-4 years total
- Traditional Longbow (modern times) – 30-40 hours
- Composite bows: these can take a week or two of actual work. However, drying time can take several months so the total time for completion can be a year or more
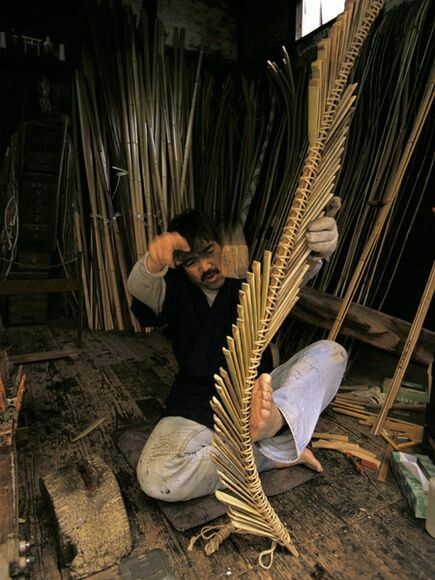
- Japanese Yumi: selecting and drying the bamboo and other woods can take years. Construction can take several weeks plus several days of testing and adjustments.
- PVC Bow (made from PVC piping): Typically, under 1 hour
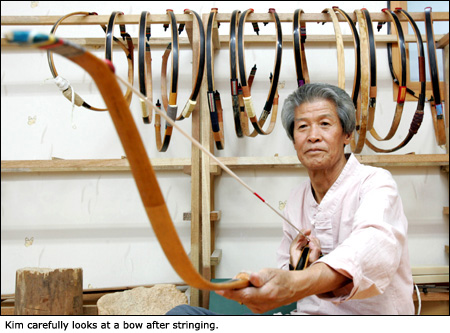
- Gakgung (Traditional Korean bow): The gakgung or traditional Korean composite bow, like other composite bows, can take over a year to fully complete
- Native American Flatbow: Construction Time: 20-40 hours. Material: Wood, often a single stave, with relatively simple construction compared to some other styles.
Bear in mind that times can vary drastically depending on the materials used as well as the skill and work ethic of the bow maker.
What is the Best Material to Make a Bow and Arrow?
The material that is most associated with the bow and arrow is wood. For a breakdown of which type of wood is the best for making a bow check out our article on archery and wood selection here.
In archery physics, there are some basic properties of a material (such as wood) that make it very desirable for creating a bow. These properties are as follows:
Elasticity: Elasticity is the property of a material or substance to return to its original shape and size when the force or stress applied to it is removed. In other words, a material can deform under stress and then return to its original form once that stress is removed.
Strength: Strength, in the context of material selection for constructing an archery bow, refers to the material’s ability to withstand the stresses and forces that the bow experiences during the drawing and releasing of the arrow. A material with high strength can endure these forces without permanently deforming, breaking, or failing.
Stability: Within the context of bow building, stability refers to the ability of a material to retain its physical properties (such as elasticity and/or strength) when the environment changes. Does the material perform predictably in hot, cold, humid, or dry conditions? If the answer is yes, the material of the bow would be classified as stable.
Types of Wood
A thorough exploration of wood selection will remain outside the scope of this particular article. We have to get down to the nitty-gritty of how to make a bow and arrow soon. Once again, we would stress that you go read our article on bow wood selection for a real in-depth article on this matter. We will however list some of the best and most common woods for bow construction here:
- Maple: Common in the northern hemisphere. Historically popular in making Asiatic composite recurve bows.
- Hickory: Abundant in North America and a strong wood. Used extensively by The Eastern Woodlands Indigenous tribes of North America.
- Yew: Historically used for making the infamous English Longbow. A stable wood with good elasticity. Not as abundant as it used to be.
- Osage Orange: Very similar in properties to Yew. Used by modern bowyers to produce traditional and historical bows such as longbows and flatbows. Many self-bows in our archery shop are made of Osage Orange.
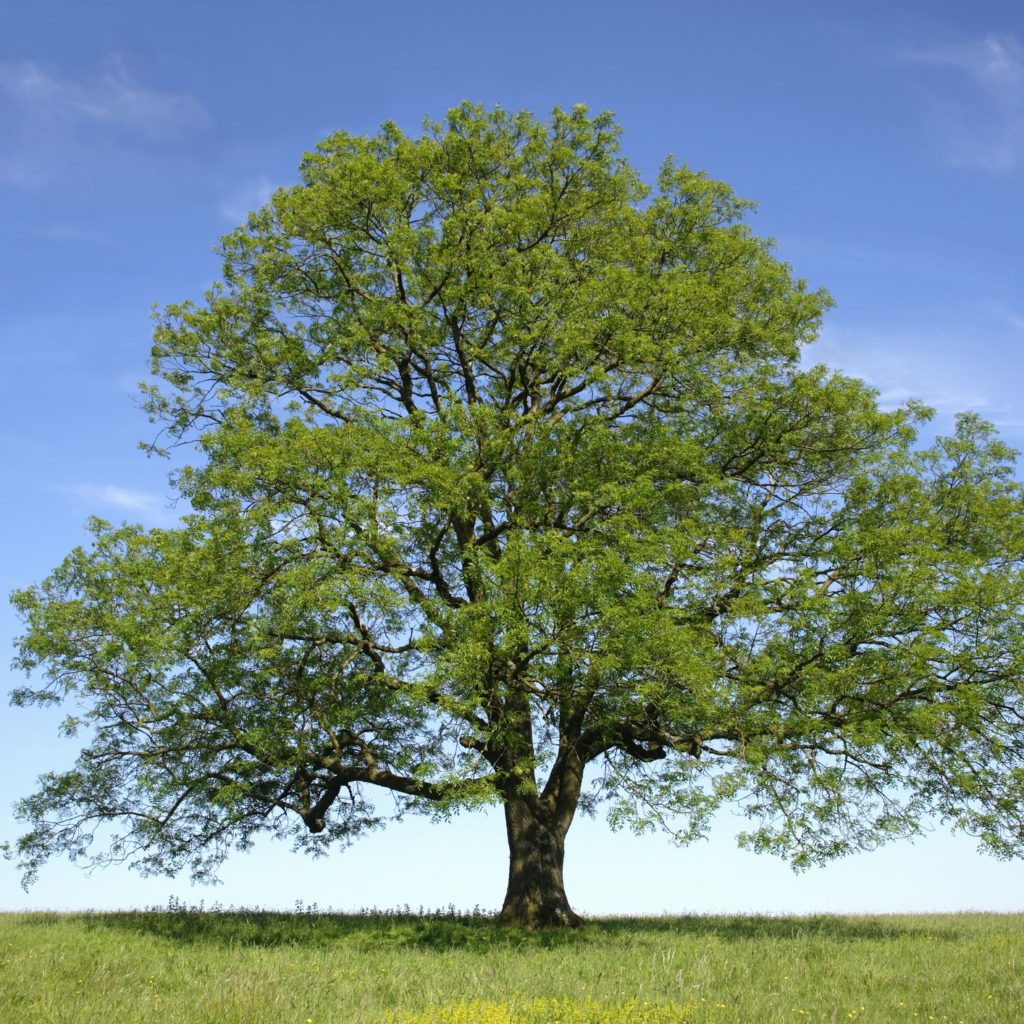
- Ash: Abundant across North America, Europe, and Asia, Ash is a dense hardwood with good strength and elastic properties.
Other Materials for Bow Building
Other than wood, there are plenty of modern materials that can be used for making a bow. They exhibit excellent properties, namely elasticity, strength, and stability, and are readily available. Here are some names of materials that you may want to familiarize yourself with:
- PVC (Polyvinyl Chloride): PVC pipes and fittings are a popular choice for DIY archery bows. They are easily accessible, inexpensive, and can be shaped into a basic bow design with minimal tools.
- CPVC (Chlorinated Polyvinyl Chloride): CPVC pipes are similar to PVC but are designed to handle higher temperatures. They can also be used for crafting bows and are available at many hardware stores.
- Fiberglass Flat Bar: Some hardware stores offer flat fiberglass bars or strips. These can be used to create simple flat bows or laminations for a composite bow.
- Aluminum Flat Bar: While less common for traditional archery bows, aluminum flat bars can be used to create a basic flat bow design.
- Carbon Fiber: Known for its exceptional strength-to-weight ratio. It is often used in high-performance bows to create lightweight and powerful limbs.
How Do You Make a Simple Homemade Bow?
Well, you’ve made it this far, and now it’s time to get down to it. Let’s make a simple homemade bow. In this section, we will focus on making a bow and arrow with materials that are readily available in or around the home.
First of all, let us stress the part in the title for this section that reads “simple”. This build will be a simple build in the sense that it will take minimal skill and time. As we’ve already mentioned, it will not involve any specialty materials, only that which is found in and around the home.
Let’s start with a self-bow made from a single stave of wood.
1. Material Selection
First things first. Let’s find a piece of wood. Perhaps you have some trees in your backyard or somewhere in the neighborhood. We will try to find a piece of wood that is dry and dead. Don’t go cutting down your neighbor’s trees or some random tree in the park. Thanks. Here are some things to consider when selecting the wood.
- Roughly 5 to 6 feet long
- Dry and dead, but not cracking or rotten. A live tree will not exhibit the strength and energy storage properties of a cured (dead) hardwood
- A species of hardwood. Hardwood trees are mostly deciduous and thrive in temperate and tropical forests. In temperate climates, they shed their leaves and are dormant in winter. Some examples include maple, ash, beech, walnut, hickory, and oak. Once again we encourage you to check out our article on the best wood for bows here
- It should be free from any severe twisting or gnarling, knots, and limbs (branches coming off the main branch)
- If the branch has a slight bulge in the center, it will make the shaping of the bow later on a little easier
2. Determining Curvature
Determine the curvature of the selected branch. Even if it is ever so slight, nearly all branches will exhibit some curvature. If you have selected a perfectly straight specimen with no curvature, you will have some more shaping to do in a later step.
Hold the piece of wood up to your eye and look down the length of it. Slowly rotate it 360°. Do this by looking down the branch from the other end as well. You should be able to notice some curvature this way if it is not obvious just by looking at it from the side.
Another recommended method would be to hold the stave against the ground at a 45-degree angle. Supporting the branch or stave at the top with one hand, press against the middle of the branch with your other hand. Apply light pressure so the wood bends an inch or two, then quickly release the middle of the branch. If the grain in the wood is mostly straight along its length, it will try to orient itself so that the belly of the future bow will face towards you and the back will face towards the ground.
3. Assigning Bow Layout
Next, we will determine the layout of the bow. This means we will assign where the riser, handle, or grip will be, as well as the upper and lower limbs. This is a fairly simple process yet it is essential to complete before we move on to the next crucial step, which is shaping the bow.
First, let us measure the exact length of the branch from tip to tip. Divide this number by two (2). Then measure from one tip to this number and make a mark (preferably with a pencil).
Next, we will measure 3 inches above and 3 inches below this central mark and make two more markings. The area between these last two markings will be the handle, otherwise known as the grip or riser in archery terminology. This reminds me, if you want a thorough breakdown of archery terminology, please see our article on the matter by clicking here. The areas of the branch that are on either side of these last two marks will be the limbs of the bow.

4. Shaping The Bow
This step will ensure that the bow limbs will bend evenly and symmetrically. Although asymmetric bows, such as the Hunnic and the Japanese Yumi do exist, this simple self-bow will have limbs that are made to bend by the same degree.
Keep in mind which side of the bow was the belly (the side facing the archer when drawing the bow). The act of removing material will take place primarily on the belly.
Several methods and tools can be used to shape the bow, by removing material. An axe, large knife, machete, or a draw knife can be used. Regardless of which tool you use, ensure that it is kept sharp. This will ensure precise and clean removal of material.
Now, just like in a previous step, where we held the bow at a 45-degree angle and applied some pressure to the branch to see where the natural curvature of the branch would be, we will use the same method to give us an idea of where we can start the removal of material.
You can apply some pressure to the middle of the wood, so the branch is displaced by 3 to 4 inches. Watch the branch carefully and see which limb bends or curves more and which bends less. The future limb which bends less can have some material removed.
Remove small amounts of material at a time. What we are doing is shaving. We are gradually removing material in small shaved-off layers until the bow limbs bend more or less the same.
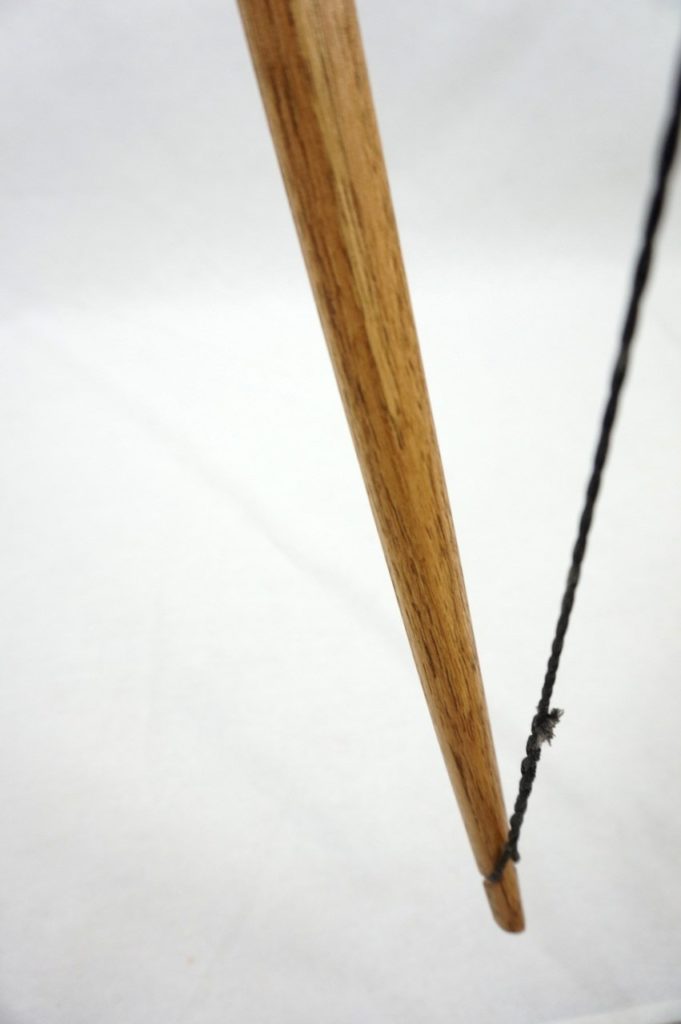
5. Cutting String Nocks
Now that you have carefully shaved off material so that the bow limbs bend more or less symmetrically, it is time to cut some nocks to hold the bowstring.
Measure and mark out the location. They should be about 3-4 centimeters (1.5 inches approx.) from the tip of the bow on each limb. This is a tricky part. Cutting the nocks too deep will compromise bow integrity, making it likely that a break would occur here. However, if you cut the nock too shallowly it will not hold the string securely. Half a centimeter or so should suffice in most cases unless the bow tip is very thin.
You can use a small and very sharp knife to cut a “V” shaped nock, or, if you have one handle, you can use a very small round file.
6. Strings & Stringing
Several materials were used for making bowstrings back in the day. Tendon, hemp, and silk were used. However, we will stay true to our homemade theme, we will try to use string material that we can find around the home, or in a hardware store. Here are some potential options.
- Fishing Line: Braided fishing lines, such as strong monofilament or fluorocarbon lines, can create a makeshift bowstring.
- Nylon Cord: Thin nylon cord, like the type used for camping or DIY projects, can be suitable for creating a basic bowstring.
- Sewing Thread: Strong nylon or polyester sewing thread can be twisted or braided together to form a functional bowstring.
Make sure that the bow string is shorter than the length of the bow by about 3 to 4 inches.
Simply tie one end of the string with a knot so that you have a 2 to 3-inch loop.
Next, tie the other unlooped end to one end of the limbs. Make sure it is nice and tight, yet make it so that it can eventually be removed. We will not cover knot-tying in this particular article.
Now you have to bend the bow and slide the other looped end into position on the other nock.
For an extensive article on stringing bows, check out our article on how to string a bow here.
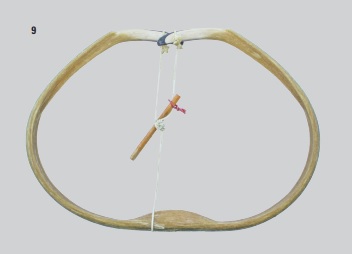
7. Tillering
Next, we will draw the bow for the first time and make note of any asymmetry in the limbs. We will then unstring the bow, remove any excess material from one limb or another, re-string, and redraw the bow. This process is known as tillering.
For a more thorough examination of the tillering process please refer to the video below.
8. Finishing Touches
The finishing touches are a matter of taste. Some like to leave their bows as minimalist as possible. Others will put a nice soft leather for the handle section. Some bows such as Ottoman Turkish-style bows are elaborately painted. The possibilities are quite limitless so we will leave this section up to you as the bowyer. We just thought it worth mentioning that bows are very useful, practical tools as well as objects of art and beauty. Feel free to put your touch into your work now that the basics of the functionality of the bow are complete.
How to Make a Bow out of PVC Pipe
Another extremely convenient way to make a homemade bow and arrow is out of PVC pipe. There is a myriad of ways that this can be done, much like with wooden bows. PVC piping makes for a good material for a bow for several reasons including the following.
PVC piping is considered a good material for a homemade bow for several reasons:
- Accessibility: PVC pipes and fittings are readily available at most hardware stores, making them easily accessible to DIY enthusiasts and beginners in bow making.
- Affordability: PVC is an affordable material, making it a cost-effective choice for those who want to experiment with bow-making without a significant financial investment.
- Ease of Shaping: PVC is relatively easy to work with, as it can be shaped, cut, and sanded using basic hand tools. This makes it suitable for people with minimal woodworking or bow-making experience.
- Consistency: PVC pipes have a uniform and predictable composition, which means that you can achieve consistent results when crafting bows with them.
- Durability: PVC is a durable and weather-resistant material, which makes bows constructed from it suitable for outdoor use.
- Customization: PVC bows can be easily customized in terms of draw weight, length, and design, allowing archers to create bows that suit their preferences.
- Low Maintenance: PVC bows generally require minimal maintenance, as PVC is resistant to moisture and does not need the same level of care as traditional wooden bows.
Another reason why PVC piping makes for a good bow material is it possesses the material characteristics that make a good bow material that we discussed previously. It is elastic and stores energy, it is relatively strong and stable.
Below is a video showcasing a super quick and easy PVC pipe bow build.
Heavy PCV Pipe Bow Builds
Another true artist of the PVC pipe bow build is The Backyard Bowyer. He makes some very respectable heavy draw-weight PVC pipe bows. Here are some of his more popular videos where he makes a 40-pound Turkish Style PVC pipe bow and the other video is a bow build resulting in over 100 pounds in the Turkish style. Yes, you read that correctly, Turkish-style PVC pipe bows. You should check it out.
How Do You Make a Longbow
Creating a longbow is a complex and time-consuming process that requires precision and woodworking skills. Here are the general steps involved in making a longbow:
Wood Selection:
Choose a suitable piece of wood for the bow stave. Common woods used for longbows include yew, osage orange, hickory, and others. Ensure the wood is straight-grained and free from knots, twists, or defects.
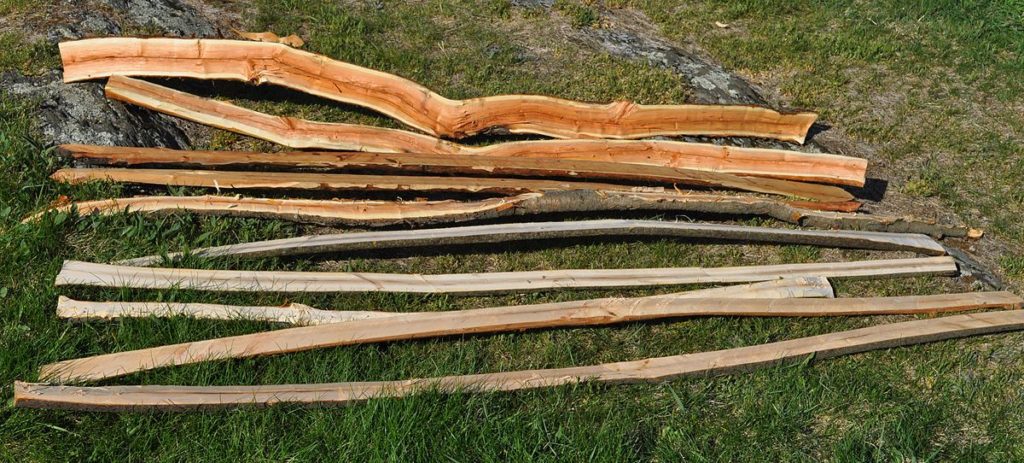
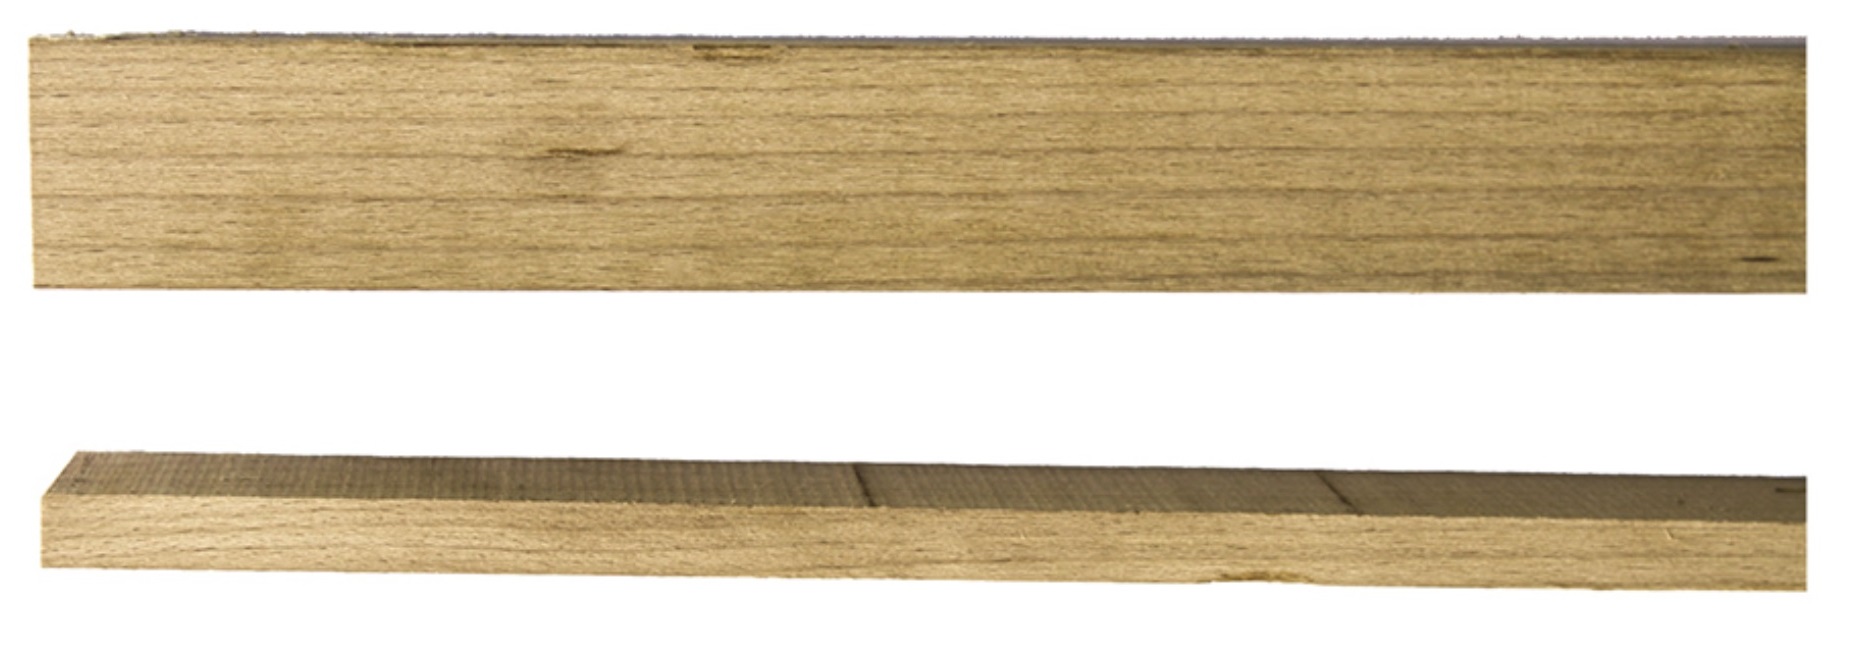
Cutting the Stave:
Cut the chosen wood into a stave, which is a long, rectangular piece of wood. The stave should be approximately the length of the desired longbow (usually around 6-7 feet) and the width of the bow’s limbs.
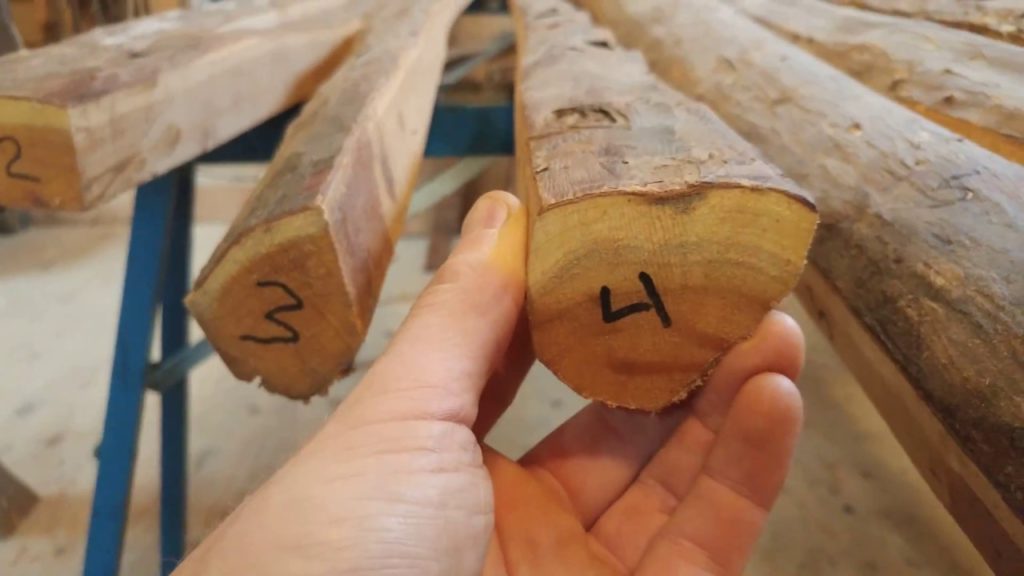
Sealing the Ends of Staves
Sealing the ends of a log before splitting it into staves is an important practice in bow making and woodworking for several reasons:
- Preventing End Grain Checking: End grain checking refers to the formation of cracks or splits at the ends of a log or stave. When wood is exposed to the air, the moisture at the ends of the log or stave evaporates more quickly than from the rest of the wood, leading to differential drying rates. This rapid moisture loss can cause the wood to check, which is undesirable when crafting a bow. Sealing the ends helps slow down the drying process, reducing the likelihood of checking.
- Minimizing Waste: Cracked or checked wood at the ends of a log or stave may need to be trimmed or discarded, resulting in wasted material. Sealing the ends helps preserve the full length of the log or stave, ensuring that more usable wood is available for crafting bows.
- Maintaining Stability: Ensuring that the wood dries uniformly and gradually can help maintain its stability and prevent warping, twisting, or other deformations. Sealing the ends contributes to this gradual drying process, which is crucial for producing a straight and reliable bow.
- Reducing Stress Concentration: The ends of the log or stave are particularly vulnerable to stress concentration, as they are more exposed to environmental factors. Sealing the ends helps maintain a balanced and consistent moisture content throughout the wood, reducing the risk of stress-related issues during the bow-making process.
Common sealants used for this purpose include wax, paint, or commercial wood sealants. Applying these sealants to the ends of the log or stave forms a barrier that slows down moisture evaporation, aiding in the proper curing of the wood and ensuring that it remains suitable for bow making.
Drying or Curing the Wood
The curing or drying of a wooden stave is a crucial step in the process of making a longbow. The drying time is essential to ensure that the wood reaches an appropriate moisture content, making it stable and suitable for bow construction.
-
Air Drying:
- Air drying is the most common method for curing bow staves. It involves placing the stave in a well-ventilated area, protected from direct sunlight and moisture. It’s important to avoid exposing the stave to rapid temperature fluctuations, as this can cause checking (cracking) or warping.
-
Drying Time:
- The time required for curing a wooden stave can vary significantly. It may take several months to a few years, depending on factors like the wood species, stave thickness, and environmental conditions. Thicker staves generally take longer to dry than thinner ones. For instance, a yew stave may take around 1-2 years, while osage orange may require 2-3 years to fully cure.
-
Moisture Content:
- The goal is to achieve a stable moisture content, typically in the range of 8-12%. This level of moisture helps prevent the wood from warping or cracking as the bow is shaped and used.
-
Checking:
- Checking, or small cracks on the ends of the stave, is common during the drying process. These can be minimized by sealing the ends of the stave with wax or paint to slow down the drying process.
-
Monitoring:
- Regularly check the stave’s moisture content using a moisture meter or by weighing the stave at regular intervals. When the weight stabilizes, it indicates that the stave has reached its desired moisture level.
-
Storing:
- Store the stave in a dry place with consistent humidity and temperature levels once it has reached the desired moisture content. This prevents the wood from reabsorbing moisture and maintains its stability.
Below is a video on quick drying your wood. It is possible, and has been done successfully, yet some swear by patience and air drying over year.
A video on some various drying methods:
Shaping & Tillering the Bow:
Rough Shaping: Begin to shape the stave into a rough bow shape, removing excess wood and leaving the basic outline of the bow. The two limbs should be symmetrical.
Tillering: Tillering is the process of carefully bending the bow to check for even limb flexibility. Use draw knives, rasps, or scrapers to remove wood from the belly (the side facing the archer) to achieve an even bend in both limbs.
Monitoring Progress: Continuously check the tiller, making adjustments as needed to ensure the limbs bend evenly when the bow is drawn.
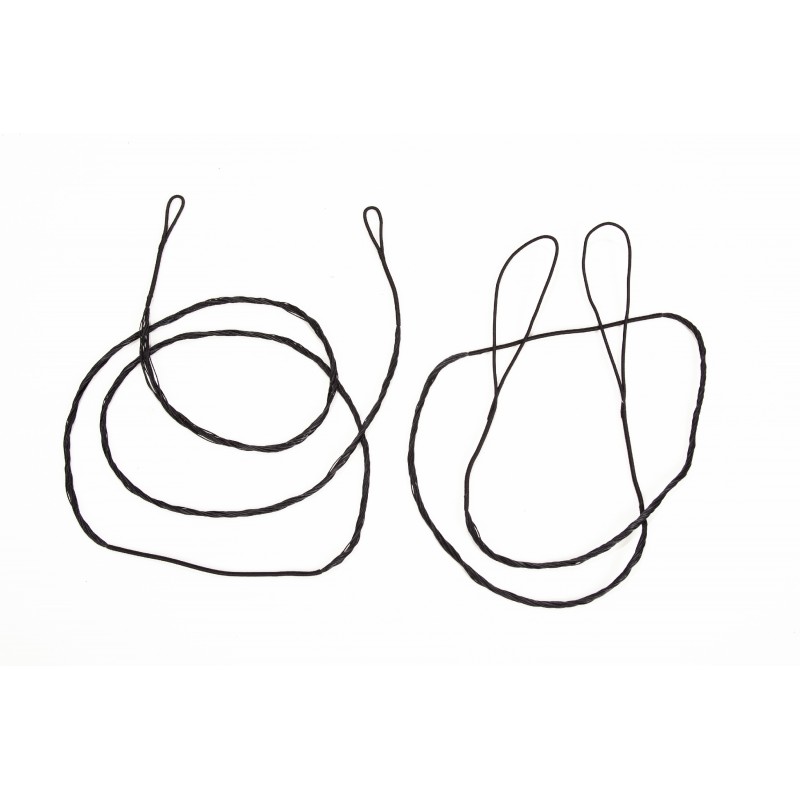
Stringing the Bow:
String Making: Craft a bowstring from suitable material, such as Dacron or Fast Flight. Ensure it is the appropriate length for your bow. One of the most common bowstrings out there is the so called Flemish Twist.
Another consideration regarding bowstrings is what length to make them. It is a common question. The video below addresses this issue:
Stringing the Bow: Carefully string the bow with the newly made bowstring. Use a bowstringer tool to do this safely. Please see our article on stringing a bow here form more.
Finishing Touches:
Sanding and Smoothing: Sand the entire bow to achieve a smooth finish. This improves the bow’s appearance and removes any rough spots.
Applying Finish: Apply a finish, such as varnish or oil, to protect the wood and enhance its appearance.
Grip and Arrow Rest: Add a grip to the bow handle and, if desired, an arrow rest. These are often made from leather or other materials.
Brace Height: Adjust the brace height (the distance between the string and the handle when unstrung) to the desired measurement, which can affect the bow’s performance.
Testing: Safely test the bow for performance and safety, ensuring it draws smoothly and does not exhibit any signs of stress or damage.
Fine-tuning: Make any final adjustments to the tiller and limb flexibility to achieve the desired draw weight and performance.
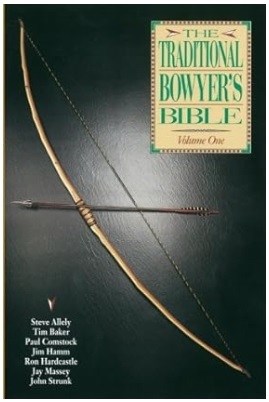
For a thorough understanding of self-bow and longbow making, we do recommend you get the work “The Traditional Bowyers Bible”. It covers all the aspects we’ve addressed here and many more. It is available on Amazon via the link below:
How to Make a Composite Bow
A truly thorough exploration of composite bow-making would be outside the scope of this article. An entire book would need to be written in order to cover all the nuances. However, we will cover some fundamentals and point the reader towards relevant information to further their own studies.
Composite bows are near and dear to the author’s heart. We have had a fascination with these particular types of bows for many years. A composite bow, as its name implies, is made from a composition or combination of materials. Unlike a self-bow, which is made from a single piece of wood, composite bows synthesize a variety of materials.
Composite bows were the chief weapon of the Eurasian nomad. They were put to use with great effect in hunting and warfare by many groups spanning Eurasia of millennia. What we are going to focus on in this section is indeed the Asiatic composite recurve bow.
Some of the groups of people to have used these bows include:
Materials
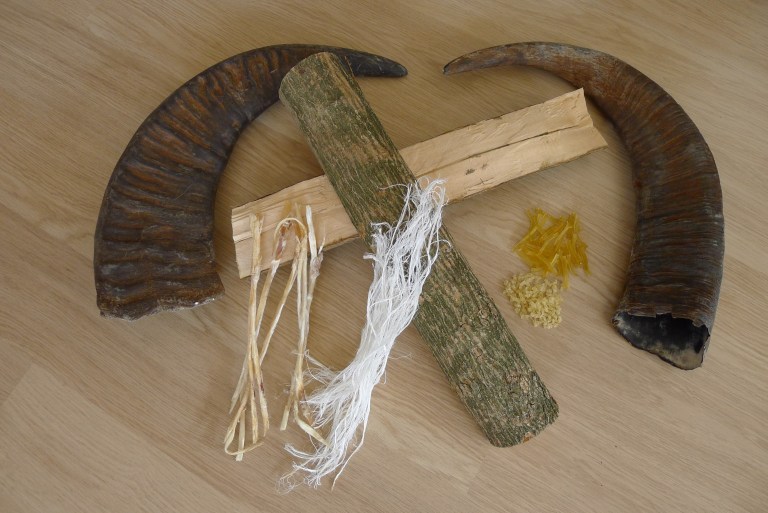
The specific materials that were used to construct these bows include:
- Wooden core. this is the backbone if you will of the bow and acts as the foundation for the other materials, which are:
- Horn. Being composed of dense keratin, (the same mineral that your hair and nails are made from) horn resists compression. It is placed on the belly of the bow (the side facing the archer when operating the bow)
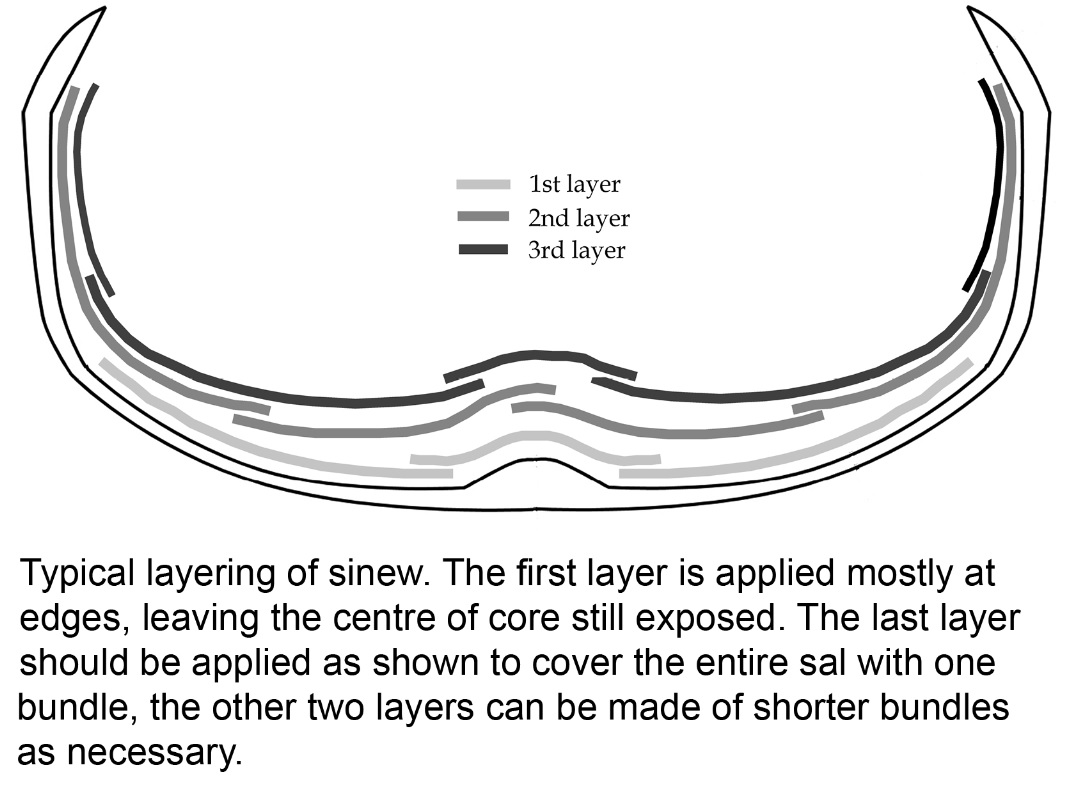
- Sinew. Tendons of animals are dried and the fibers are separated. Sinew has a mechanical property that is in a way opposite to that of horn. It resists tension. Much like an elastic band that is stretched and then released, it will want to return to its original unintensified state. The sinew is glued to the back of the bow.
Because of the use of horn in making composite bows, they are also sometimes referred to as “horn bows”. For an even deeper dive into the history and use of horn bows, check out our article on the subject by clicking here.
Composite Bow Building Literature
Much of the inspiration for this section comes from the book “
Tools
We will need a few more tools to make a composite bow as compared to making a self-bow. Some prefer the original specialty hand tools but modern power tools will work. A bandsaw will work just as well as a hand saw. Here are some of the tools required:
- Bowyer’s bench (tezgahi) with hold in it for bending wood. A standard work table or bench with a vice will work fine
- Saws (for cutting wood and horn)
- Hatchet (cutting, shaving wood)
- Adzes (a curved hatchet for shaping wood)
- Raspes and files
- Variety of scrapers (including toothed ones)
- Tendiyek (ropes with a wooden block, used for binding horn to the wooden core)
- Gouge (for carving wooden core)
- Combs (for combing sinew)
- Mallet or hammer (for hammering out and separating sinew fibers)
- Tepelik (limb formers)
- Asa gezi (tillering stick)
- Glue pot and brushes
As you can see, the amount of tools required can be extensive as compared to self-bows.
The Core
The core of the Asiatic composite bow is the backbone, the spine of the bow if you will. It holds the other components (horn and sinew) in place and gives the overall shape of the bow. The core is made from wood. Various nomadic cultures who made these bows used a variety of hardwoods. Popular species included:
- Birch
- Ash
- Hornbeam
- Mulberry
- Bamboo (Korean, Japanese)
- Maple
Maple was the preferred wood for Ottoman Turkish bows. It is resilient, has very even and straight grains, and takes adhesives well, which helps when horn and/or sinew has to be glued to it.
Asiatic composite cores are assembled in sections. Once several choice pieces of wood that are free of knots, splits, holes, or other defects they are cured. Typically the wooden core is composed of two limb sections spliced to the central handle piece (3 pieces total). Some 5 piece builds are also done, with the limbs being composed of two sections each, joined to the handle section.
A common length of a finished Ottoman bow (measured knock to knock along the curve of the belly) is about 48 inches. The handle sections would normally be about 4 inches, making each limb about 22 inches long.
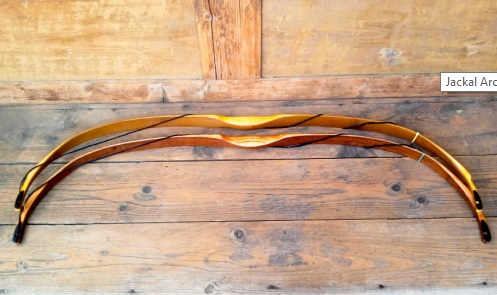
Forming and Splicing
The two identical limbs are soaked for 1 to 2 weeks then boiled for about an hour and clamped onto forms that will determine its rough shape. These are left to dry for several weeks to months.
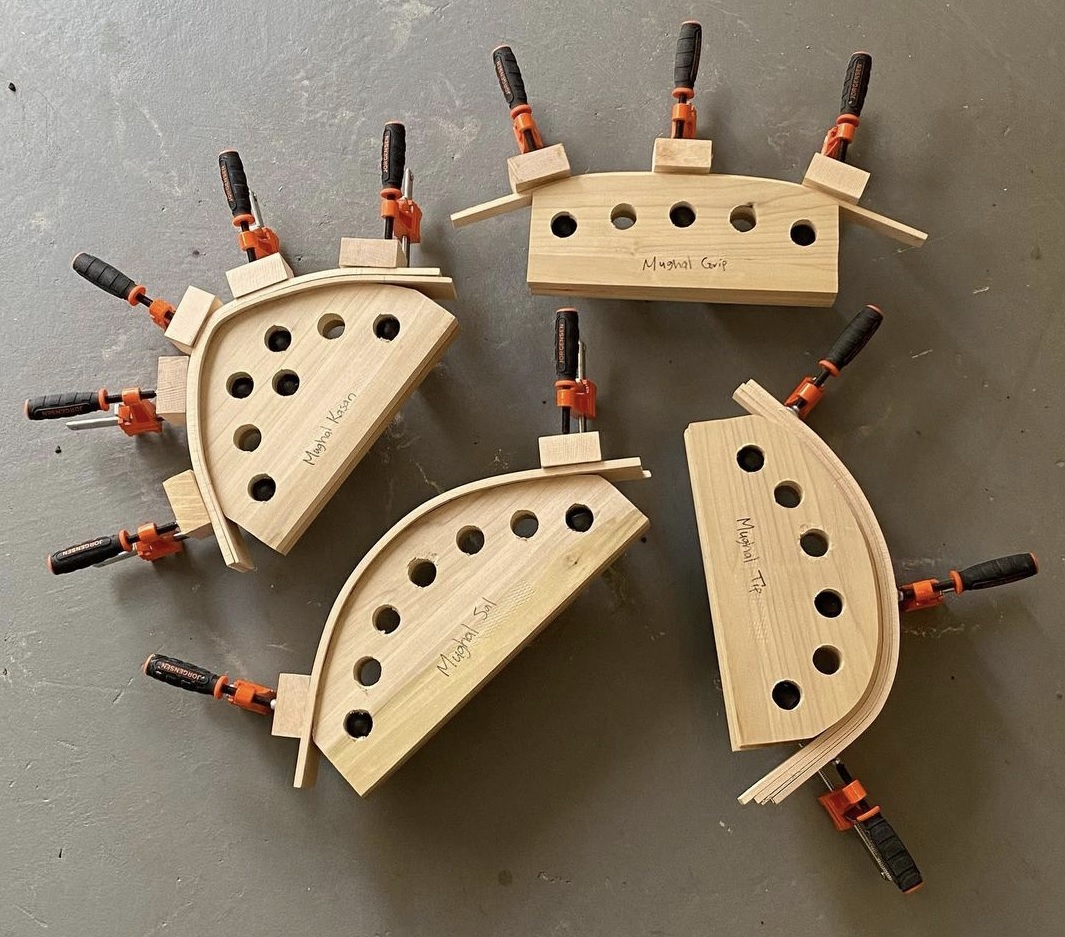
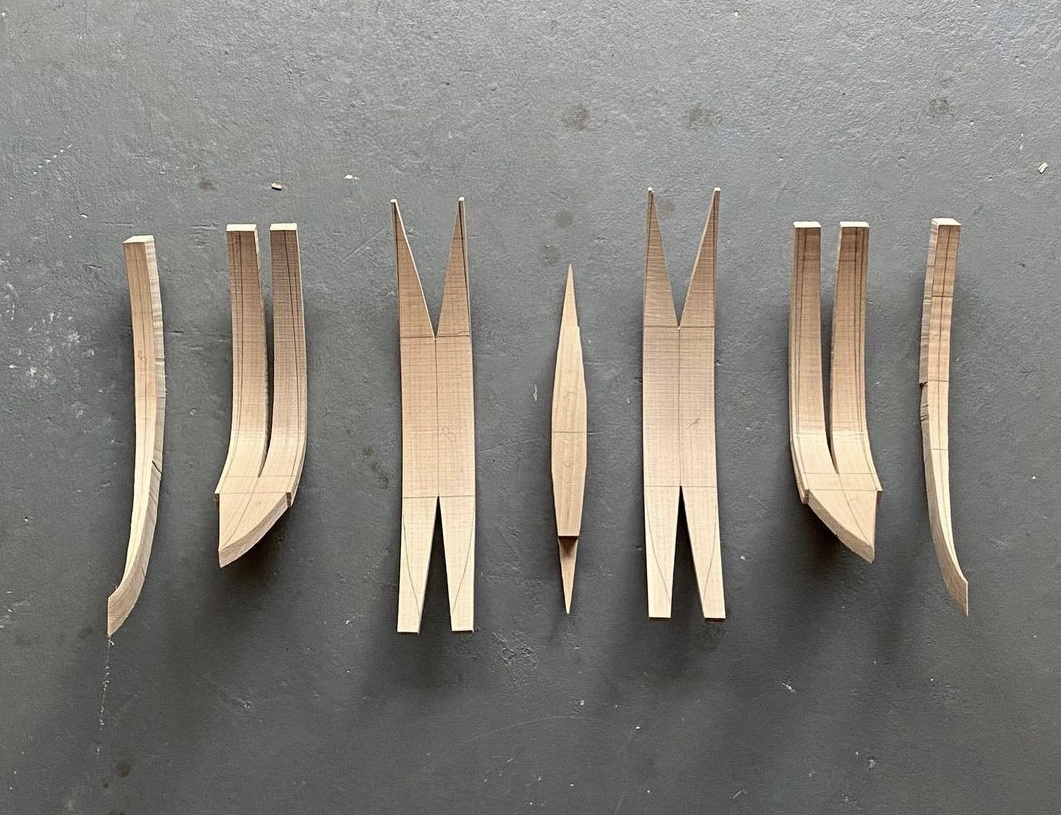
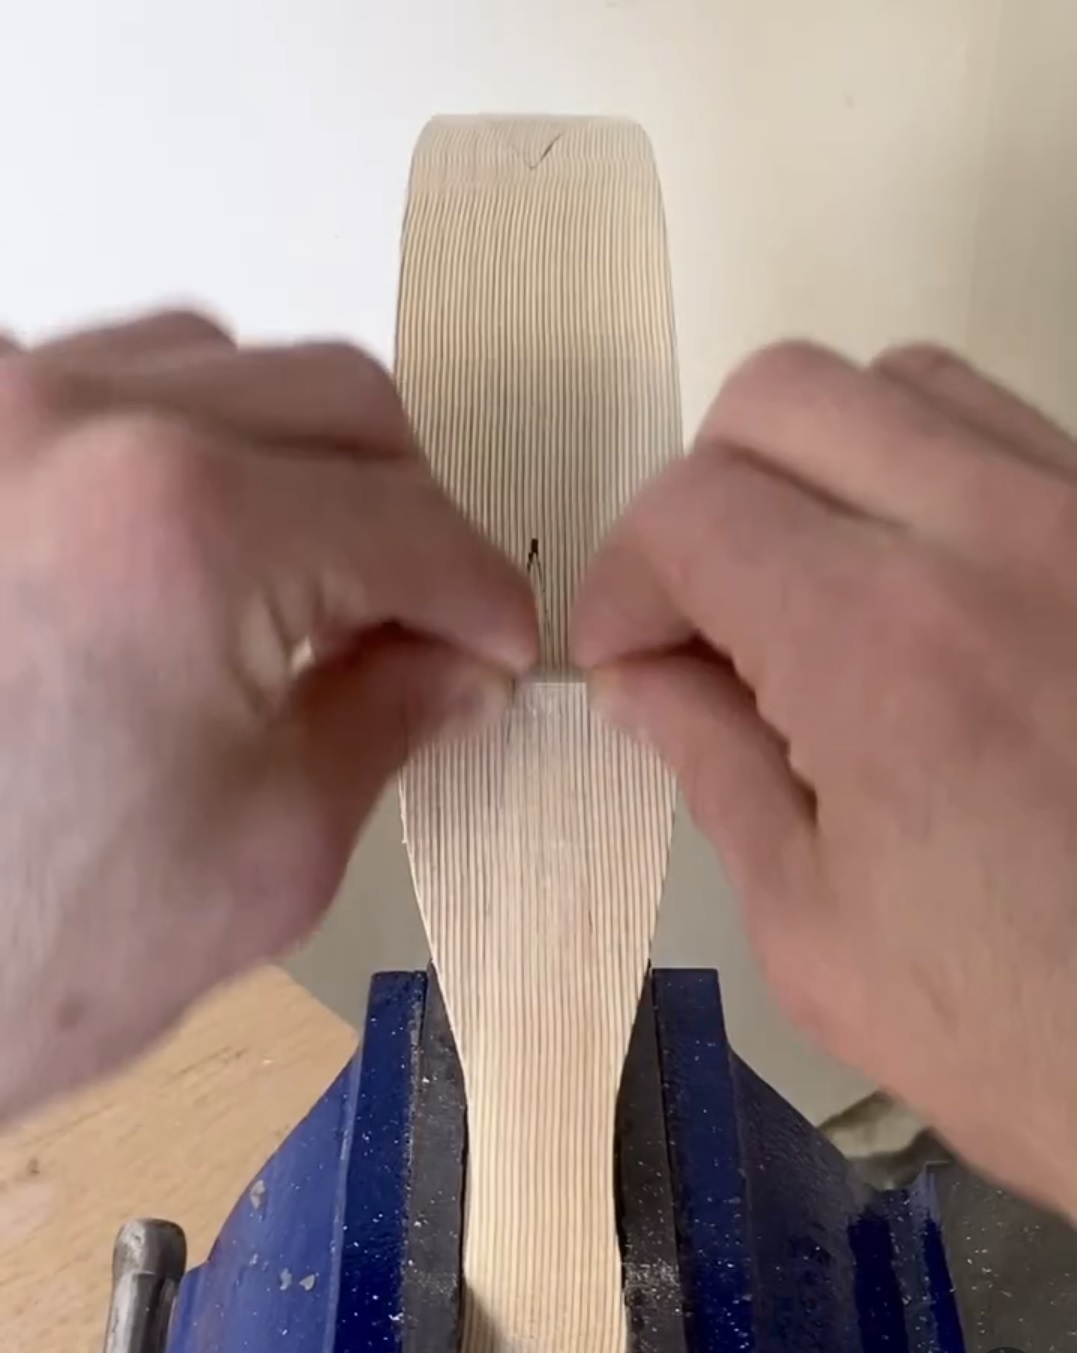
The formed limbs are then ready to be joined to the central handle or grip section. This is done with “V” splices. They are called thus because of the wedge shape is an elongated V in its form.
The Horn
Horn has the mechanical property of resisting compression. If it is squeezed or pressed upon itself it will have a tendency to return to its original state. This is why horn is used on the belly of composite bows. As the archer draws the bow, the horn on the belly will compress, storing energy. When the archer releases the bowstring to shoot the arrow, this stored energy is released. You may read more about horn-bows in our article here.
Horn was extracted from a variety of animals. The Scythians used Ibex horn. The Magyar got theirs from their Grey Cattle. Saracen and Turkish sources advise the use of horn from mountain goats.
Today the most widely used horn comes from Water Buffalo.
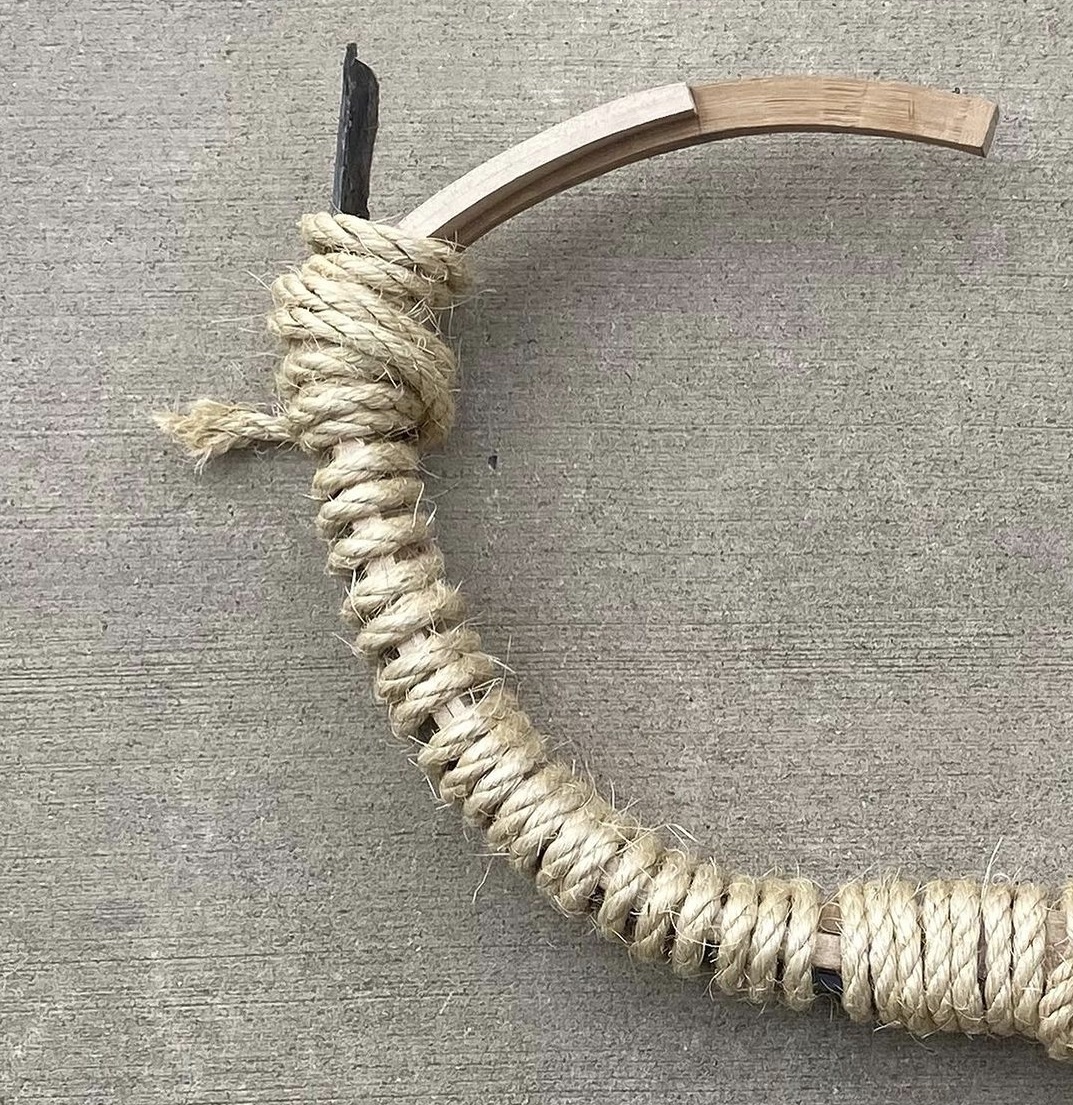
First, the belly of the bow is scored. Tight parallel grooves are cut into the wooden core. This increases surface area and helps ensure a better bond between the adhesive, core, and horn layer.
Next, the horn is cut into strips to match the profile of the core. Various organic glues, specifically a glue derived from the swim bladders of fish are commonly used. This glue dried slowly, allowing the bowyer to perform his work. Nowadays, modern, strong glues are used. The horn is attached and secured by winding a rope tightly around the joined core and horn.
Shaping
After the horn has been attached the bow is then shaped again. The centerline is established. This will be the center of the bow along its length. The core and horn are then trimmed, sanded, and filed into shape. The back of the bow is then scored with grooves, much like the belly of the bow was for the horn.
The Sinew
A typical amount of sinew for a bow should account for roughly 1/3 of the total weight of the bow. Ottoman Turkish bows weigh in at about 300 to 350 grams, so the sinew and glue together should be about 100 grams or so. Dividing by two for each limb gives us about 50-60 grams.
The sinew must first be processed. This involves beating it and separating the sinew fibers.
The sinew is then soaked in the heated glue and then applied in sayers to the back of the bow.
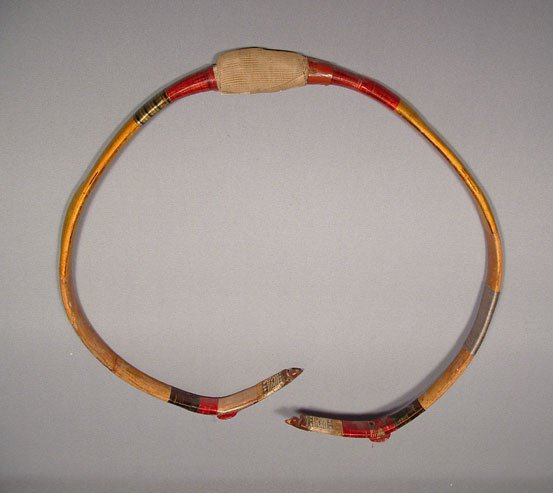
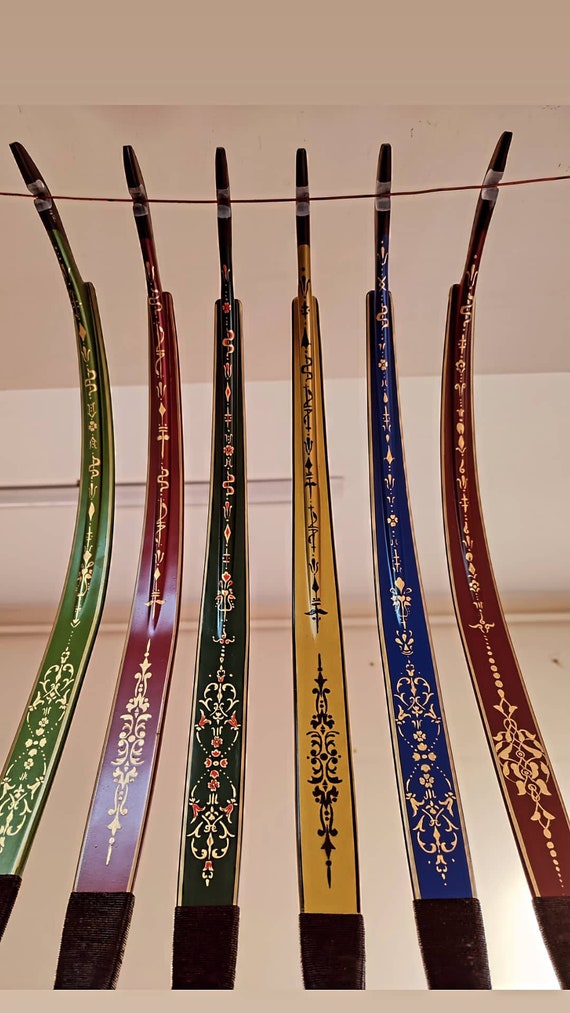
Finishing Touches
Some bows of the Asiatic composite type are beautiful works of art as well as functional tools. The Ottoman Turkish variety was intricately painted and decorated. Here are some exquisite examples.


How to Make a Powerful Bow
So you want to be a hero? But of course you do. Well, you’re going to need a powerful bow. Making a powerful bow is not that much different from making a lighter draw-weight bow in terms of the building process. Here is a great video on how to make a powerful bow on the cheap. This is by far one of the simplest ways to get a heavy bow going. PVC pipe is also an option.
For self-bows, typically the thicker the bow, the heavier it will be.
For composite bows, adding more sinew layers will provide the extra draw weight needed for very powerful bows.
How to Make a Bow and Arrow in the Wild
Perhaps you may find yourself in some sort of survival situaltion. A bow and arrow would be handy, especially if you find yourself getting hungry. But you don’t have a bow on you. Not to worry, you’ll make one because you’re awesome. Seriously though, knowledge of how to make a bow and arrow could save your life. Here is a great video on how to make a survival bow in the wild.
If you’re the type of person who is not going to take the end of the world lying down, I would also check out some of these books. They contain a plethora of survival information not just on how to make a bow and arrow but all sorts of essential survival knowledge. Click images for links.


How to Make a Bow and Arrow – By Bow Type
We’ve selected some video inspiration on how to make a bow and arrow. Here are several bow builds of various kinds.
Japanese Yumi
Ottoman Turkish Horn Bow
Mongolian Bow
English Longbow
How to Make a Laminated Bow
How to Make a Bow and Arrow – Video Inspiration
If you want to see some innovative, clever and downright amazing bow builds then check out the CAMBO LIFESTYLE YouTube channel. These videos will provide some inspiration to any future bowyer, and they are just fun to watch. No affiliation.
Bow Making Courses
If you really want to jump ahead in your bow-making journey, we would suggest you look into a bow-making course. Videos, books, and awesome blog articles (like this one) can get you far, but eventually, you will have to get practical and start building. You will learn from your own struggles and challenges. If however, you were to be shown some of the tricks of the trade by an experienced bow maker in person, you would accelerate your learning curve. Here are some recommended bow-making courses available.
NOWSTRIKEARCHERY
If you are in the UK, close to Essex, check out their workshops. Only 199 British Pounds for the longbow course. I would check it out if I was in the UK for sure.
Red Hill Archery
Based in Ontario, Canada, they offer several intensive courses, from bow making to arrow and bowstring making.
Organic Archery
If you are in the Nebraska area, check out their workshops. They are in-depth multi-day events that will go over everything you need to know for building self-bows.
https://www.organicarchery.com/workshops
Thank You! Take Care!